# Deploying to Maven Central
URL: https://www.cesarsotovalero.net/blog/deploying-to-maven-central.html
Date: 2020-01-06
Author: César Soto Valero
Tags: java
Summary: Deploying to Maven Central is essential for sharing Java libraries with the world. In this post, I provide a detailed, step-by-step guide on how to deploy a software artifact to Maven Central, covering everything from setting up a Sonatype account to configuring POM files. By following this tutorial, you'll be able to streamline your deployment process and ensure your libraries are available for reuse to all developers out there.
Maven Central is the de-facto repository for hosting software artifacts that compile to the JVM.
It is one of the world’s largest and oldest archives of software libraries.
In this post, I'll describe the process of releasing a new artifact in Maven Central following a step-by-step approach.

_© Excerpt of 1% of the Maven Dependency Graph of software artifacts. [Source](https://dl.acm.org/doi/10.1109/MSR.2019.00060)._
# Create a JIRA ticket in Sonatype
First, you need to create a JIRA account and submit a ticket there requesting for a project namespace in Sonatype (aka, GroupId):
1. [Create a JIRA account](https://issues.sonatype.org/secure/Signup!default.jspa)
2. [Create a New Project ticket](https://issues.sonatype.org/secure/CreateIssue.jspa?issuetype=21&pid=10134)
A staging repository is already configured for the requested GroupId, you need to find someone with a deployer role that comments on the ticket to verify your request.
Below is an example of a ticket that I created requesting a repository for the namespace `se.kth.castor`
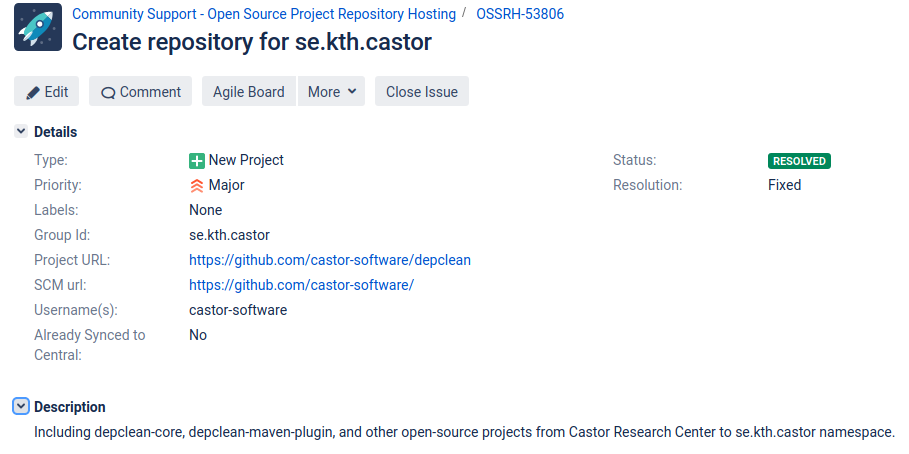
The ticked review is a manual process, it normally takes less than 2 business days.
# Configuring the POM
After the approval of the ticket, you need to add additional information to the POM of the Maven project or module to be deployed. Follow the steps below exactly as they are.
- Choose appropriate coordinates as explained [here](https://central.sonatype.org/pages/choosing-your-coordinates):
```xml
com.example.applications
example-application
1.4.7
```
- Add your project name, description, and URL:
```xml
Example Application
Describe your Application
http://www.example.com/example-application
```
- Add licence information:
```xml
The Apache License, Version 2.0
http://www.apache.org/licenses/LICENSE-2.0.txt
```
- Add information about developer/s :
```xml
Manfred Moser
manfred@sonatype.com
Sonatype
http://www.sonatype.com
```
- Add SCM information, the following example uses GitHub:
```xml
scm:git:git://github.com/simpligility/ossrh-demo.git
scm:git:ssh://github.com:simpligility/ossrh-demo.git
http://github.com/simpligility/ossrh-demo/tree/master
```
- Add distribution management and authentication to Sonatype via the `nexus-staging-maven-plugin`:
```xml
ossrh
https://oss.sonatype.org/content/repositories/snapshots
org.sonatype.plugins
nexus-staging-maven-plugin
1.6.7
true
ossrh
https://oss.sonatype.org/
true
...
```
- Add javadoc and sources attachments using the `maven-javadoc-plugin` and `maven-source-plugin` :
```xml
org.apache.maven.plugins
maven-source-plugin
2.2.1
attach-sources
jar-no-fork
org.apache.maven.plugins
maven-javadoc-plugin
2.9.1
attach-javadocs
jar
```
- Add GPG signed components using the `maven-gpg-plugin`:
```xml
org.apache.maven.plugins
maven-gpg-plugin
1.5
sign-artifacts
verify
sign
```
- Follow [these instructions](https://central.sonatype.org/pages/working-with-pgp-signatures) to encrypt your artifact with [gpg2](https://linux.die.net/man/1/gpg2) and distribute your public key to a key server (e.g., [http://keys.gnupg.net](http://keys.gnupg.net)). Do not forget to choose a passphrase to protect your secret key. Then add your gpg credentials with your passphrase to your Maven`settings.xml` file locally and use the [Sonatype Nexus repository manager](https://oss.sonatype.org/) as the server :
```xml
ossrh
true
gpg2
the_pass_phrase
ossrh
the_user_name
the_password
r
```
- Add `nexus-staging-maven-plugin` with the following configurations:
```xml
org.sonatype.plugins
nexus-staging-maven-plugin
1.6.7
true
ossrh
https://oss.sonatype.org/
true
```
# Release to Maven Central
Finally, run a deployment to OSSRH and an automated release to the Central Repository with the following command:
```shell
mvn clean deploy
```
After this, Central sync will be activated for your namespace. After you successfully deploy, your component will be published to Maven Central, typically within 10 minutes, though updates to [search.maven.org](https://search.maven.org) can take up to two hours.
If you have any issue, let me know in the comments below. Happy deploying :smile:
# References
- [Apache Maven Official Instructions](https://maven.apache.org/repository/guide-central-repository-upload)
- [OSSRH Guide](https://central.sonatype.org/pages/ossrh-guide)
- [Tutorial on YouTube](https://www.youtube.com/watch?v=bxP9IuJbcDQ)